To perform this Finance-related task, you must first Navigate to the FIN Self Service Homepages.
Purpose:
A Travel Authorization is first step in the travel process. Travel Authorizations must be created and approved prior to the travel dates. This document is used to estimate the costs for the trip, obtain the necessary approvals and generate an encumbrance that will be relieved after the corresponding Expense Report is filed. Travel Authorizations must be approved by your HR Supervisor, Expense Approver (generally the Director/Dean with budget oversight) and the Pre-Pay Auditor (Purchasing Travel Coordinator). Travel Authorizations must be fully approved before the date of travel. PeopleSoft will not allow approvals to occur after the travel date so please plan ahead.
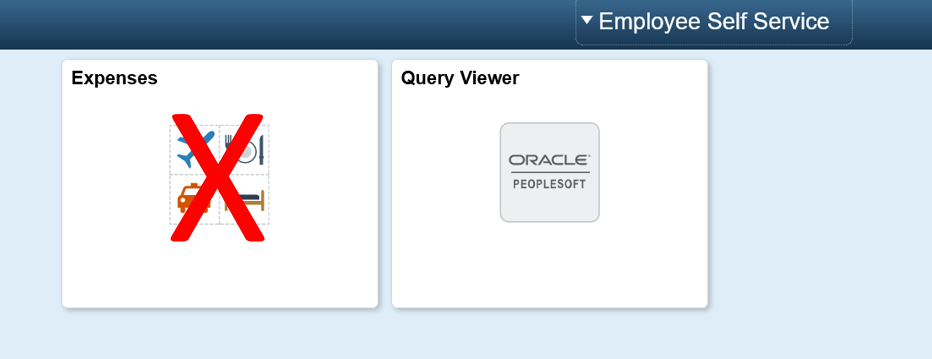
NOTE: Do not use the Expense Tile on the Self-Service Page. It is currently not operating properly. SBCTC is working to resolve the issue. When the issues are resolved, these instructions will be updated.
Navigation: NavBar > Menu > FSCM Employee Self-Service > Travel and Expenses > Travel Authorizations > Create/Modify.
Follow these steps to create a Travel Authorization:
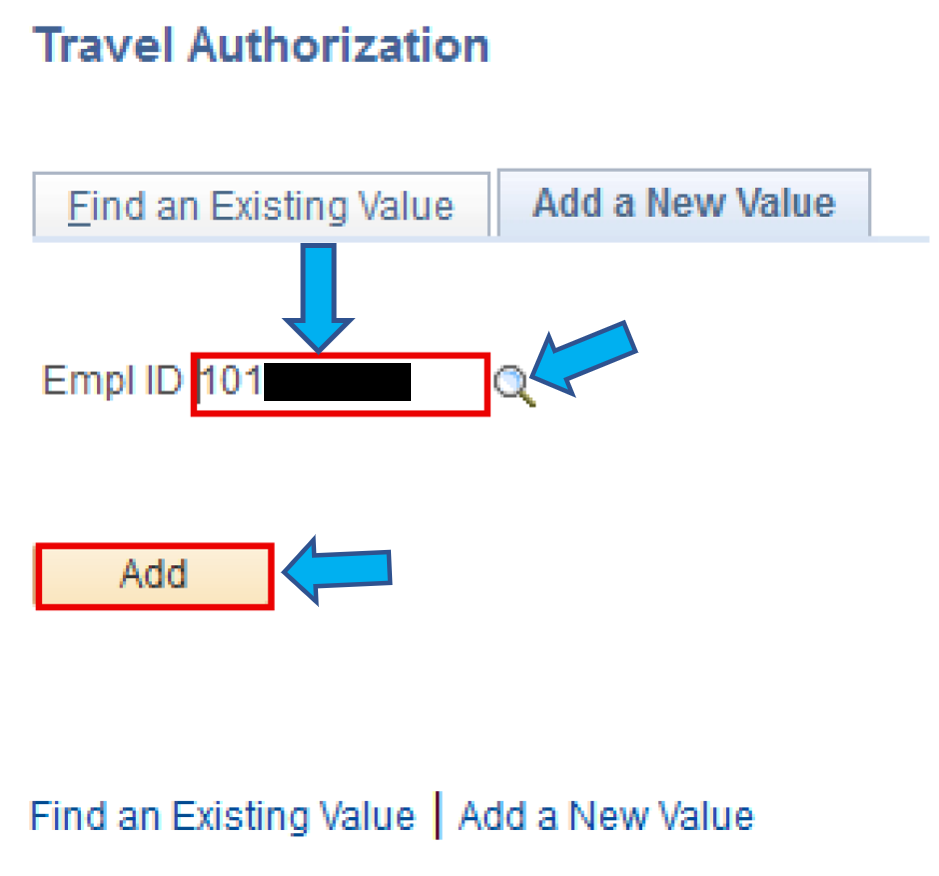
1. Travel Authorization search page displays.
Note: Depending on your role, the Empl ID (aka ctcLink ID) will default into the field. If you have been delegated access to create travel documents for another person, you will want to click on the Search icon and select the Empl ID of the person you wish to create the Travel Authorization for.
2. Select Add.
Create New Travel Authorization
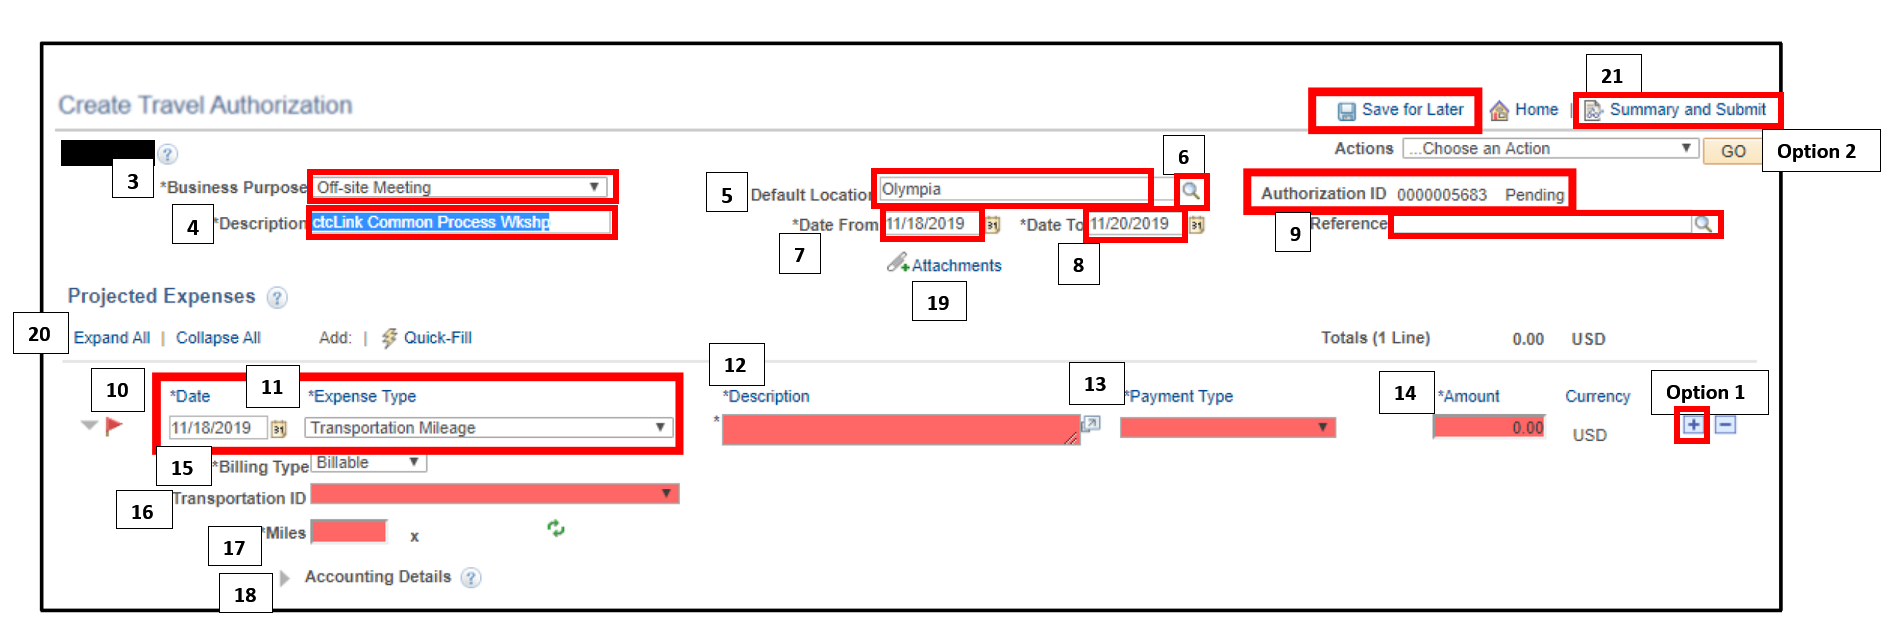
3. When the Create Travel Authorization page displays, select Business Purpose from the drop-down menu.
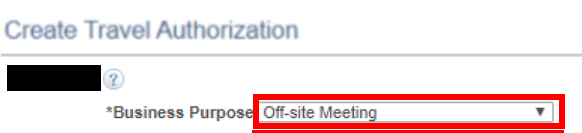
All required fields on this page start with an asterisks *. The options are global settings. Select the option that most closely represents the reason you are traveling.
4. Enter a Description.
![]()
This field should provide a brief description of your trip. This field will be seen by approvers and is also a key field if you need to search Travel Authorizations in the future.
5. Select Default Location from the drop-down menu.
![]()
The Default Location field is used to calculate per diem rates for hotels and meals in the Projected Expenses section below. The locations are based on the state per diem rates and are maintained by the SBCTC.
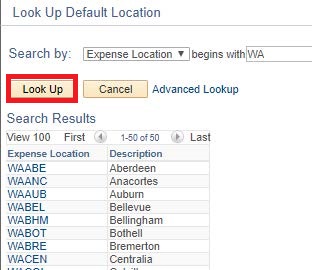
6. Select Look Up and chose the code closest to your destination.
You can either type the city name directly or select the Lookup icon to search for codes. The easiest way to search for codes in Washington is to enter ‘WA’ in the field next to ‘begins with’. Select Look Up. This will return all available choices.
7. Enter a date or use the calendar menu in the Date From field to select the first day of travel.
8. Enter a date or use the calendar menu in the Date To field to select the last day of travel.
![]()
9. Enter or lookup the Reference. This is not a required field.
![]()
Projected Expenses Section
10. In the Projected Expenses section, enter a date or use the calendar menu to select a Date for the line item.
11. Select the appropriate Expense Type from the drop-down menu.
Note: Unless the selected type specifically states “no per diem” the system will automatically populate the per diem rate for all meals and hotels based on the Location entered below. If the “no per diem” amount is selected, you must provide your justification in the Description field.
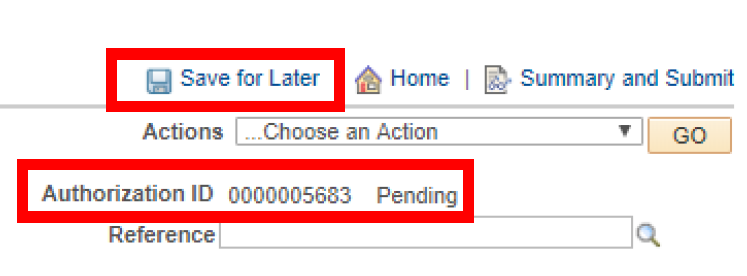
Time Saving Tip: If you have a multi-line TA, you can select the Save for Later link now. Saving at this point allows you avoid losing your work and also provides options to select Actions that will save you data entry for multi-line Travel Authorizations.
Once you have saved the Travel Authorization, ctcLink will automatically assign an Authorization ID that is marked as Pending. You will also see the remaining line fields will be highlighted in red. That is expected and will be addressed in the upcoming steps.You must have an expense line started in order to save your Travel Authorization. See View and Modify a Travel Authorization to return to your save TA and resume editing.
12. Enter Description.
13. Select the Payment Type from the drop-down menu.
Note: The following are the only acceptable options available in the dropdown menu. DO NOT select Pre-Paid or either of the Taxable Fringe Benefit options.
- Employee – if you will be paying for the expense directly with a Cash Advance or seeking reimbursement on an Expense Report after the trip.
- Pcard – if paying for the expense using a College PCard. This generally occurs for conference registration fees and all modes of transportation (airline tickets, train tickets, rental cars and motor pool vans). Please note the employee does not get reimbursed for any expenses that are paid with the college's Pcard. This option is generally used so the budget owner can see the full expense of the travel being requested (expenses that need reimbursed to the employee as well as any expenses that the college paid using the Pcard).
14. Enter the Amount if not associated with per diem in the the Amount field.
Note: The Amount will automatically default based on the Location if the Expense Type is calculated using per diem rates.

15. Select the Billing Type from the drop-down menu.

Note: This a required field and generally you should accept the default of Billable. If your travel expense is going to be funded by a grant/project, this field is used to indicate whether the expense line is eligible to be picked up by Project Costing so it can be billed for (or not).
- Billable – transaction line will get picked up by Project Costing only if it has a Project ID in the funding distribution. You must enter the necessary Program and Project fields under the Accounting Details section.
- Non-Billable – transaction will not get picked up by Project Costing, regardless of whether it has a Project ID or not. You will need to populate the Account field.
16. Select Transportation ID from drop down menu. If there is no ID to select, please contact the Travel Administrator (AccountsPayable@spscc.edu).
17. If you entered Transportation Mileage as the Expense Type, you'll need to enter the mileage in the the Miles field.

Accounting Details Section
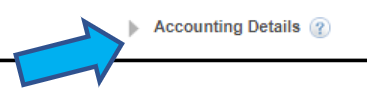
18. Expand the Accounting Detail section by clicking on the triangle on the left and enter the applicable chart field values.
At minimum the required chart field values include:
- Account
Operating Unit (should default to 7240) - Fund
- Department
- Class
- State Purpose (should be N unless IT equipment)

19. If applicable, add Attachments by clicking on the green + sign.
Note: This is where you can upload documents supporting your travel that would be helpful for the Approvers and to assist the Travel Coordinator in booking your travel arrangements such as conference registration information and agenda, email with hotel confirmation, screen shots of desired airline flights, etc.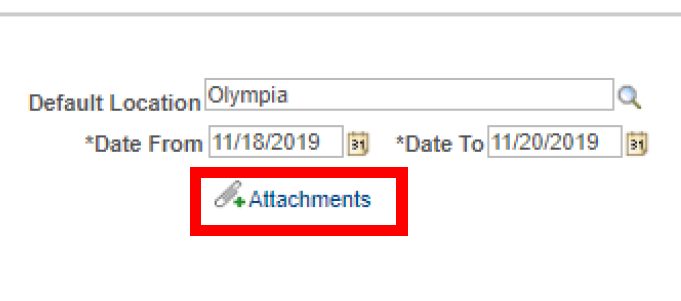
Options prior to submitting TA for approval:
Option 1 - Add New Rows
You can continue to add items to the Travel Authorization (TA). Select the Add a New Row [+] icon to add another projected expense.

Option 2 - Save for Later
You can save the report with or without invalid or missing information, which you can modify it later. If you are not ready to submit your Travel Authorization (TA), you can select the Save for Later button in the upper right corner of the screen.
This action will issue the TA Authorization ID which you will use in the Search field when you return complete the submission process (see View and Modify a Travel Authorization).
When you select the Save for Later button, Expenses displays the "Save Confirmation" page to indicate that it successfully saved the travel authorization and indicates if missing or invalid information exists.
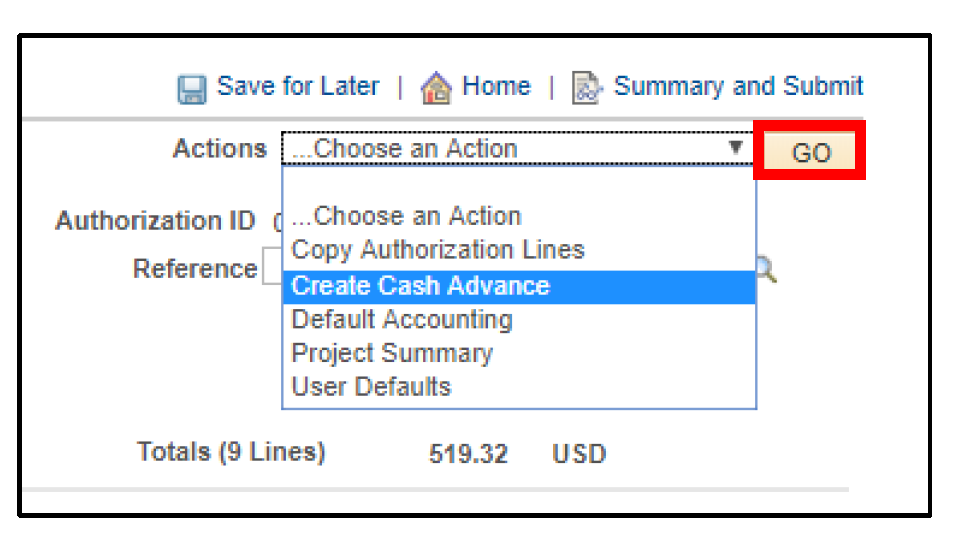
Option 3 - Create a Cash Advance (CA)
NOTE: If you plan to request a Cash Advance, you MUST do that before you submit your Travel Authorization for approval. You can only request a Cash Advance to cover lodging and meals. Please allow five business days to process Cash Advances.
- Click the Save for Later button which will issue the TA Authorization ID.
- Select the Create Cash Advance link in the Actions menu, which opens a new window in ctcLink and populates the Business Purpose and Advance Description fields in the header of the CA to match the TA entry. After the CA is submitted you can return to the TA entry and submit.
- Select the Save for Later button to save the travel authorization without submitting it for approval. You can save the report with or without invalid or missing information, and you can modify it later.
- When you select the Save for Later button, Expenses displays the Save Confirmation page to indicate that it successfully saved the travel authorization and indicates if missing or invalid information exists.
For more information, see Create a Cash Advance.
Submitting the Travel Authorization
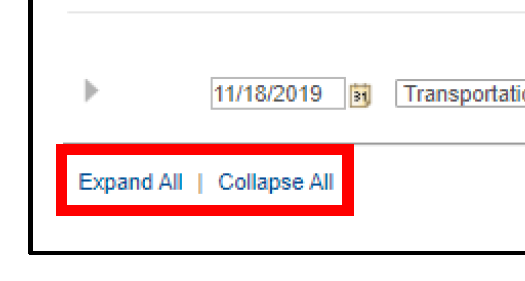
20. Review your TA.
Once you have completed all of the necessary information, you should perform a final review of the Travel Authorization. Expand All / Collapse All links can be selected to see or hide all of the details you have entered. This can be helpful to collapse when doing a final review to make sure you have entered the correct expense types for each day.
21. Submit the TA by selecting Summary and Submit.

Note: When you select the Submit button, Expenses displays the Submit Confirmation page to indicate that it successfully saved and submitted the travel authorization.
After you submit the travel authorization, you cannot modify it unless an approver returns it to you for modification.