BEFORE YOU BEGIN:
First time travelers must submit a Traveler's Information Form(Link) before you can create and submit Travel Authorizations, Cash Advances or Expense Reports. The Business Office staff will set up your Traveler Profile and notify you when you can begin using these processes.
To perform this Finance-related task, you must first Navigate to the FIN Self Service Homepages.
Purpose:
An Expense Report (ER) is document created after travel to record actual cost of travel; it may be used to produce a reimbursement and/or reconcile a Cash Advance. It is used for ALL Employee Reimbursements and replaces A-19.
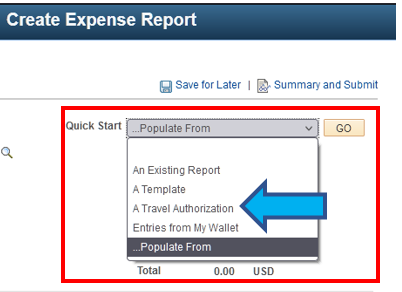
Note: Expense Reports can be created from a blank Expense Report (the default setting). However, you can also use the Quick Start drop-down button, to pull information from an approved Travel Authorization, from an existing Expense Report, or from a template.
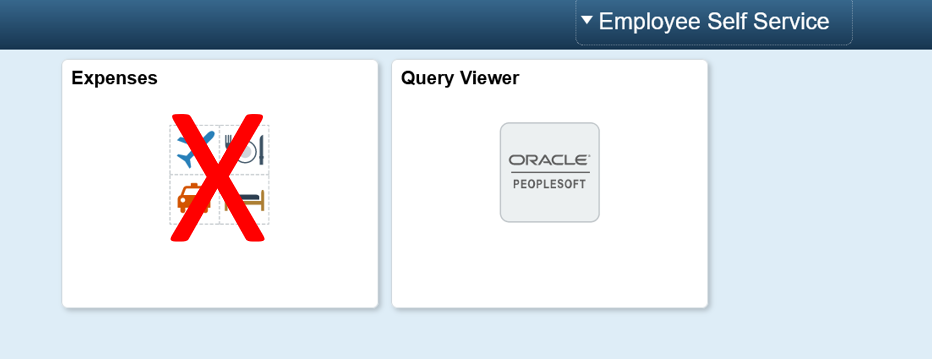
NOTE: Do not use the Expense Tile on the Self-Service Page. It is currently not operating properly. SBCTC is working to resolve the issue. When the issues are resolved, these instructions will be updated.
Navigation: NavBar > Menu > Employee Self-Service > Travel and Expenses > Expense Reports > Create/Modify
Search for Expense Report
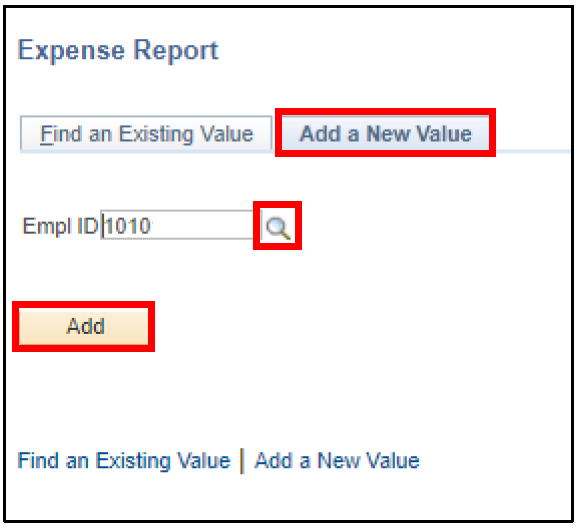
1. Expense Report search page, select Add a New Value.
2. Enter Empl ID (aka ctcLink ID). Use the magnifying glass to Search for the ID if completing this report for someone else.
3. Select Add.
Create Expense Report
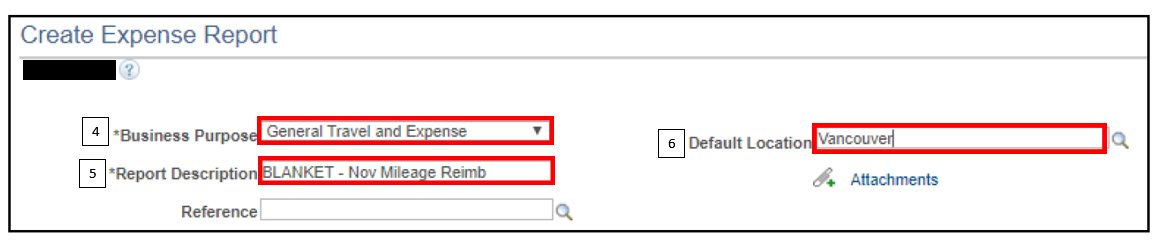
4. When the Create Expense Report page displays. Select the Business Purpose from the drop-down menu.
Note: The options are global settings. Select the option that most closely represents the reason you traveled. Generally, if you are submitting for mileage reimbursement against a Blanket Travel Authorization, you will select “General Travel and Expense.”
5. Enter Report Description.
Note: For a Blanket Travel Authorization, please indicate BLANKET prior to the description. This field will be seen by approvers and is also a key field if you need to search Expense Reports in the future.
6. Select the Default Location from the drop-down menu.
Note: The Default Location field is used to calculate per diem rates for hotels and meals in the Expenses section below. The locations are based on the state per diem rates and are maintained by the SBCTC. You can either type the city name directly or select the Lookup icon to search for codes.
Note: The Reference field is optional and can be utilized to add additional description for the report, such the employee’s department. This field is only 10 characters long.
Expenses Section
7. Under the Expenses Section, select the Date from the calendar menu.
8. Select the Expense Type from the drop-down menu.
9. Enter Description (the reason for the trip / reimbursement).
10. Select Payment Type from the drop-down menu.
Note: The following are the only acceptable options available in the dropdown menu. DO NOT select Pre-Paid or either of the Taxable Fringe Benefit options.
- Employee – if you have already paid for the expense and are seeking reimbursement.
- Pcard – if the Purchasing Department paid for the expense using a College PCard. This generally occurs for conference registration fees and all modes of transportation (airline tickets, train tickets, rental cars and motorpool vans). This will rarely be applicable for Blanket Travel Authorizations.
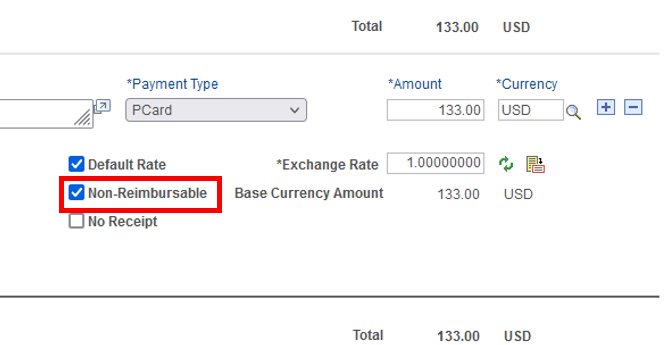
- If selecting Pcard as the Payment Type you must also check the box next to Non-Reimburseable.
11. Enter Amount. Amount will not be available if the line is for a mileage-based expense type.
Note: The Amount will automatically default based on the Location if the Expense Type is calculated using per diem rates. If not associated with per diem, enter the amount. In the case of Transportation Mileage, this will automatically calculate when you enter the miles.
Note: Currency should default to USD.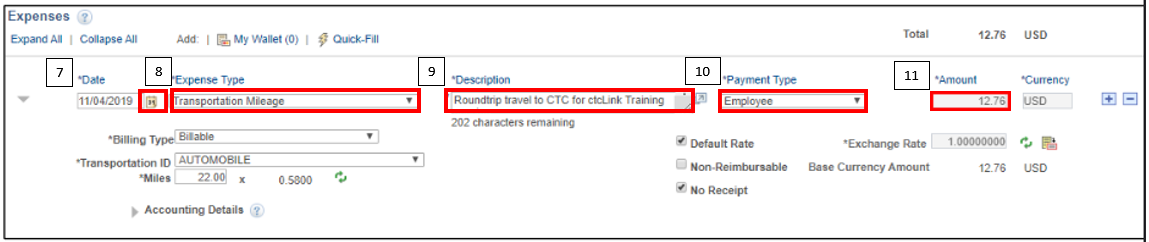
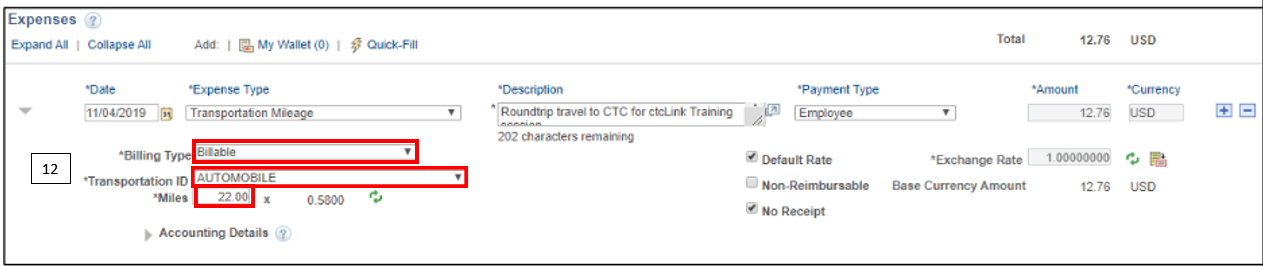
12. Select Billing Type from the drop-down menu. There are three options:
- If the line is for a mileage-based expense type, select Transportation ID from the drop-down menu. Select AUTOMOBILE.
- If the line is for a mileage-based expense type, enter Miles.
- If the line is for a per diem rate-based expense type, enter Location (see step 6). Note: Do not need to use line level location if default location in the header (top of document) is correct. (Line location overrides header default location).
Note: This a required field and generally you should accept the default of Billable. If your travel expense will be funded by a grant/project, this field is used to indicate whether the expense line is eligible to be picked up by Project Costing so it can be billed for (or not).
- Billable – transaction line will get picked up by Project Costing only if it has a Project ID in the funding distribution. You must enter the necessary Program and Project fields under the Accounting Details section.
- Non-Billable – transaction will not get picked up by Project Costing, regardless of whether it has a Project ID or not. You will need to populate the Account field.
Checkboxes on the right side of the page:
Default Rate – please leave this box checked. The exchange rate is fixed to 1.00 and cannot be modified.
Non-Reimbursable – please check this box if the Payment Type selected was PCard. This signifies that the expense has already been paid for by the College and therefore should not be reimbursable to the employee.
No Receipt – this box should be checked if the Expense Type would not have a receipt to support it. For instance, Transportation Mileage and Per Diem Meals do not have receipts required. For hotels, Uber rides and all expenses providing receipts, the box should be left unchecked.
Accounting Details Section
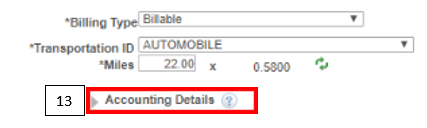
13. Select to expand Accounting Details and input your chart field values.
Note: You MUST update the defaults in these fields to the actual Chartfields for the budget your travel expenses are being charged against. There are eight required fields:
- Amount – will default to the amount of the expense line but allows you to allocate travel expenses to multiple budgets. Select the Add a Row button to add additional lines. The sum of the rows must equal the total amount for that expense line. **
- GL Unit – must always be set to WA240
- Oper Unit – must always be set to 7240
- Account – defaults based on the Expense Type. Accounts replaced the sub-object codes in Legacy. See the last page of this document for the travel Account fields. Please double check that the default account correctly reflects the actual type of travel expense.
- Fund – is always required and some funds also require an Appropriation. For example Fund 101, is now Fund 001 and Appropriation 101. Refer to the budget crosswalk located on the myClark Finance webpage www.clark.edu/faculty-staff/ctclink/myclarkfinance.php
- Class – replaces the Program in the old budget number – refer to crosswalks
- Dept – replaces the Org in the old budget number – refer to crosswalks
- State Purpose – this field is mandated by the state to track IT-related spending. You must select Y/N.

Saving the Expense Report
Once you have completed entering all fields for this expense line, you can select the Save for Later link at the top of the page. This will create a Report ID that will allow you to save changes and exit the document so you can return to it later. You can save the Expense Report with or without invalid or missing information. When you select the Save for Later button, Expenses displays the Save Confirmation page to indicate that it successfully saved the Expense Report and indicates if missing or invalid information exists.

Time Saving Tip: Once you have saved your Expense Report, you can set the Default Accounting For Report from the Actions dropdown menu. Setting the default accounting will allow you to split the expense between multiple budgets based on a percentage as opposed to the amount.
Add Attachments to Expense Report
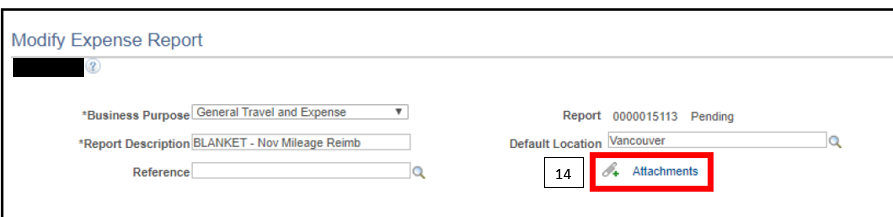
14. Select the Attachments link to attach a document at the header level of an expense report.
Use the Expense Report Attachments page to add new attachments or remove attachments from the expense report. This is where you will upload the scanned copies of the receipts that support your expenses. This is also where you should attach your HR Supervisor’s approval for your travel if the expense report is being submitted without an approved Travel Authorization in ctcLink.
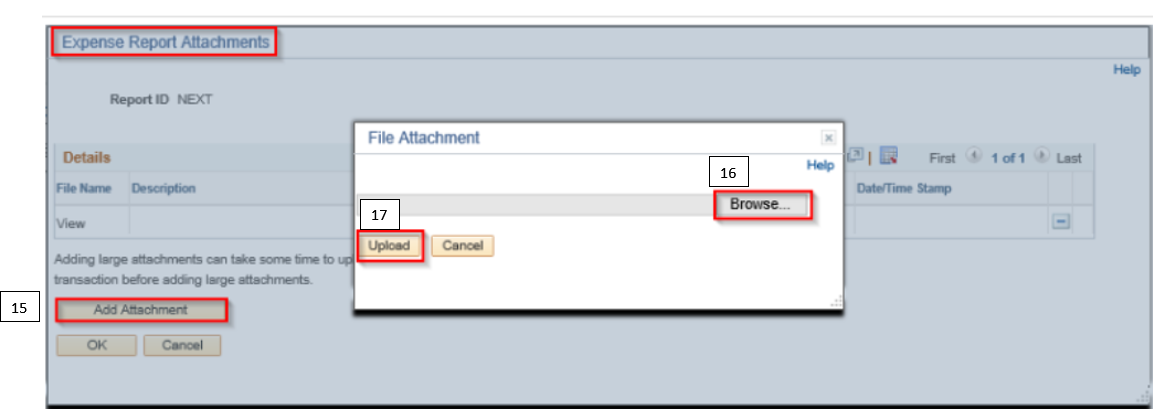
15. Select the Add Attachment button. The File Attachment window appears.
16. Select the Browse button and navigate to the location where you stored your attachment and select it.
17. Select the Upload button. Notice that the attachments link has a “(1)” after it. This means that there is one attachment. The system updates this number every time you add or delete an attachment.
Add / Delete Expense Lines
18.If the Expense Report needs lines added or removed, select the Add a New Row [+] or Delete a Row [-] icon. If new lines are added, repeat steps 13 - 17 above.

Review and Submit Expense Report
19. Select the Summary and Submit button.This will open a new page that will summarize your Expense Report.
20. Review your Expense Report to confirm accuracy. Enter any additional attributes or details for the Expense Report line item as necessary, such as indicators for:
- Non-Reimbursable
- No Receipt
- Attendees
- Ticket Number
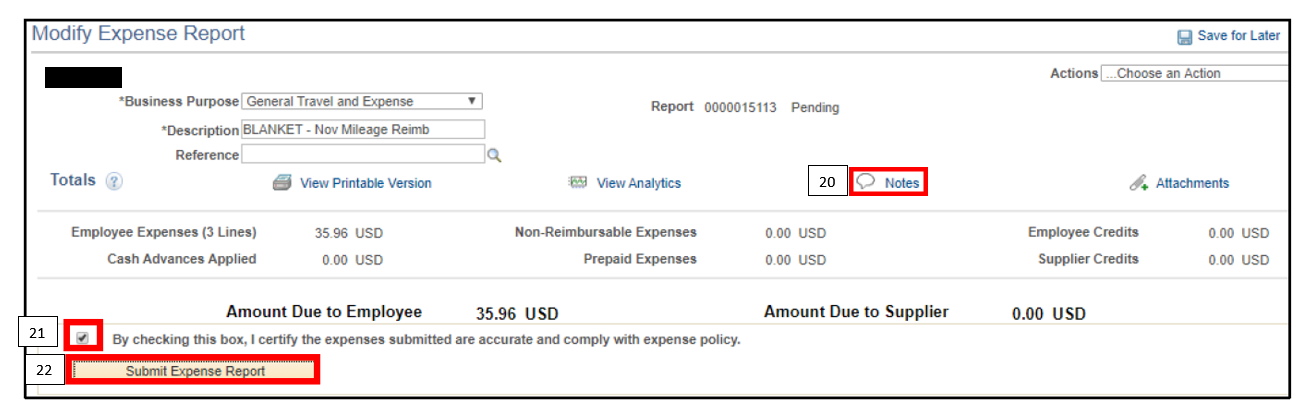
If you would like to add any additional notes for the Travel Coordinator, select the Notes link.
21. Select the checkbox to certify that the expenses submitted are accurate and comply with expense policies.
22. Select Submit Expense Report.
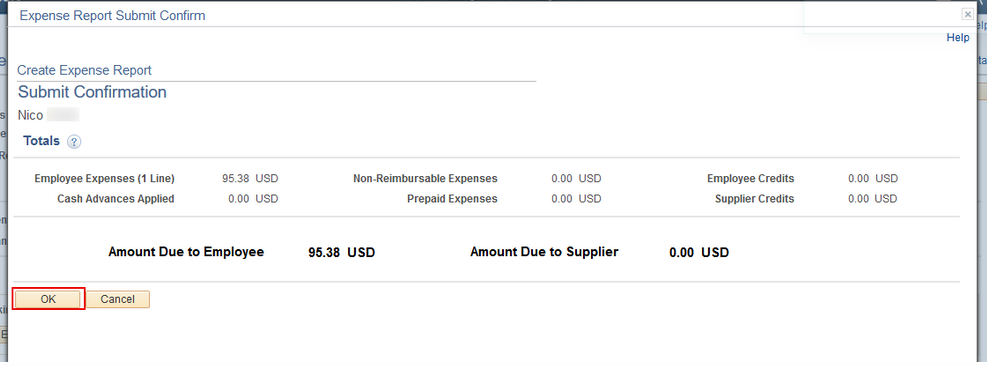
22. The Expense Report Submit Confirmation page displays. Select OK.
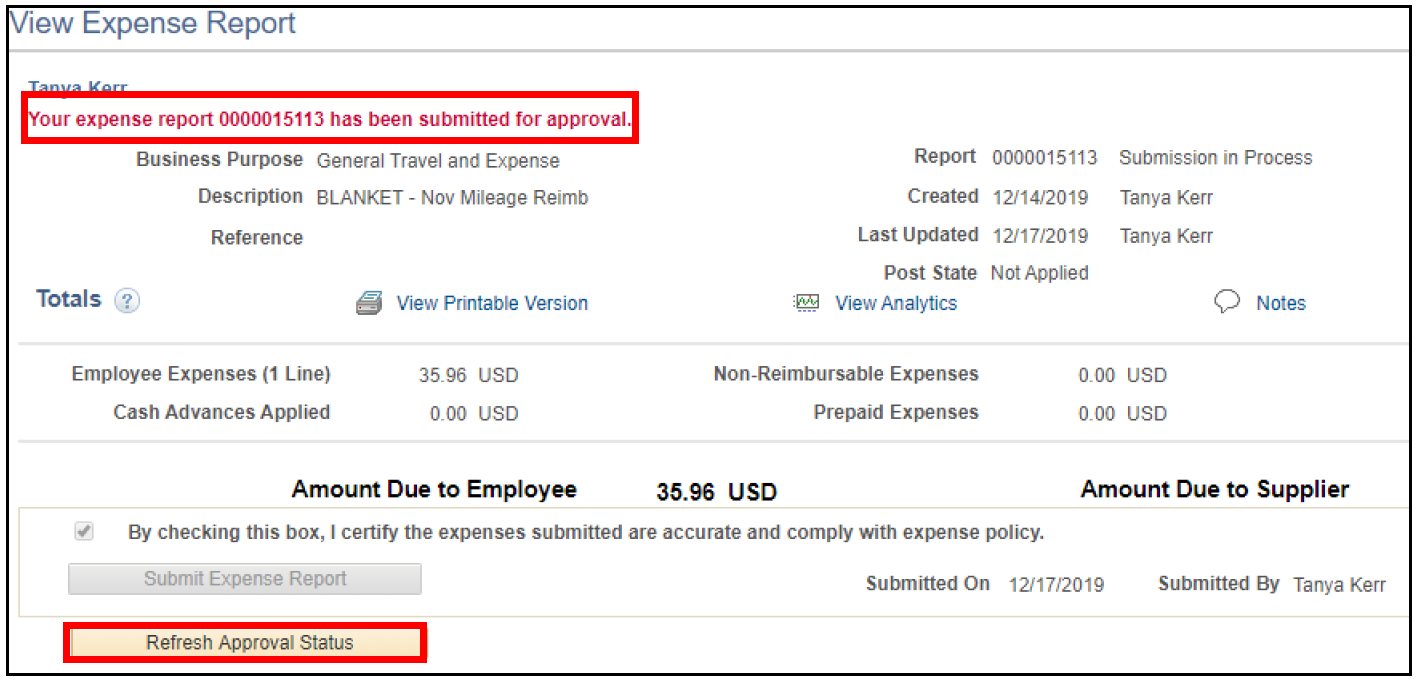
23. You will receive a note that your Expense Report has been submitted for approval. Select the Refresh Approval Status button to see the approval workflow for your Expense Report.
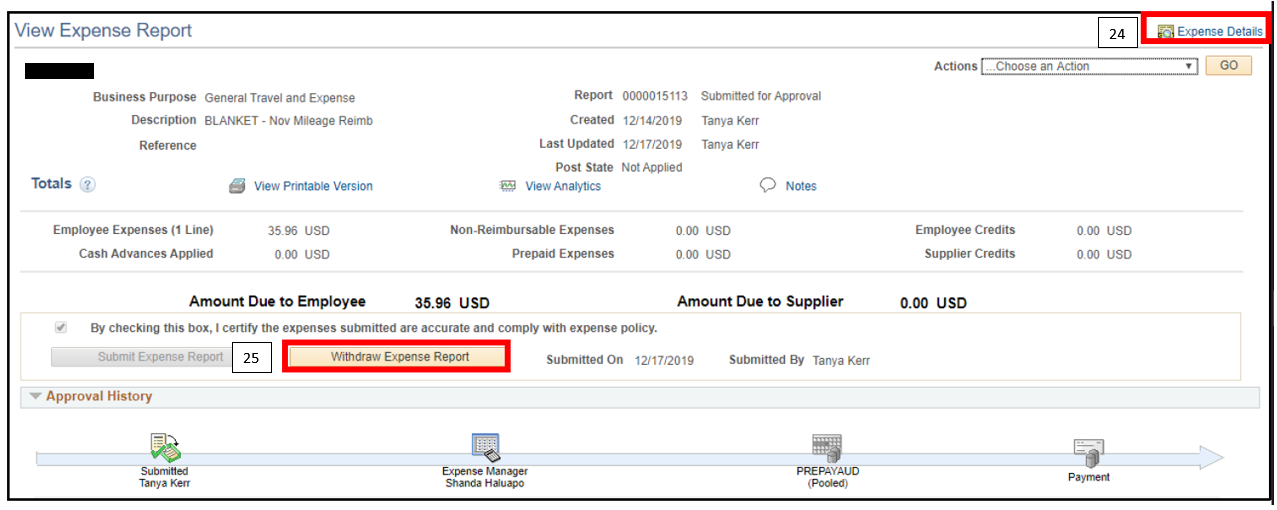
24.You can select the Expense Details link if you would like to return to the detailed page.
25. If you need to make any changes to your Expense Report after it has been submitted for approval, select the Withdraw Expense Report button. This will pull the Expense Report out of the approval workflow. After making your changes, you must submit it for approval again (steps 19-22).
Note: Once an Expense Report has been submitted, you will not be able to make changes or access it through the Create/Modify screen. If you do need to review your Expense Report, you should access it from the View screen where you can search using your vyvLink ID or Expense Report #.
Process is complete