The first time you connect to the VPN, you will need to configure the connection. After that first time, you can skip ahead to "Starting the VPN"
Configure the VPN connection
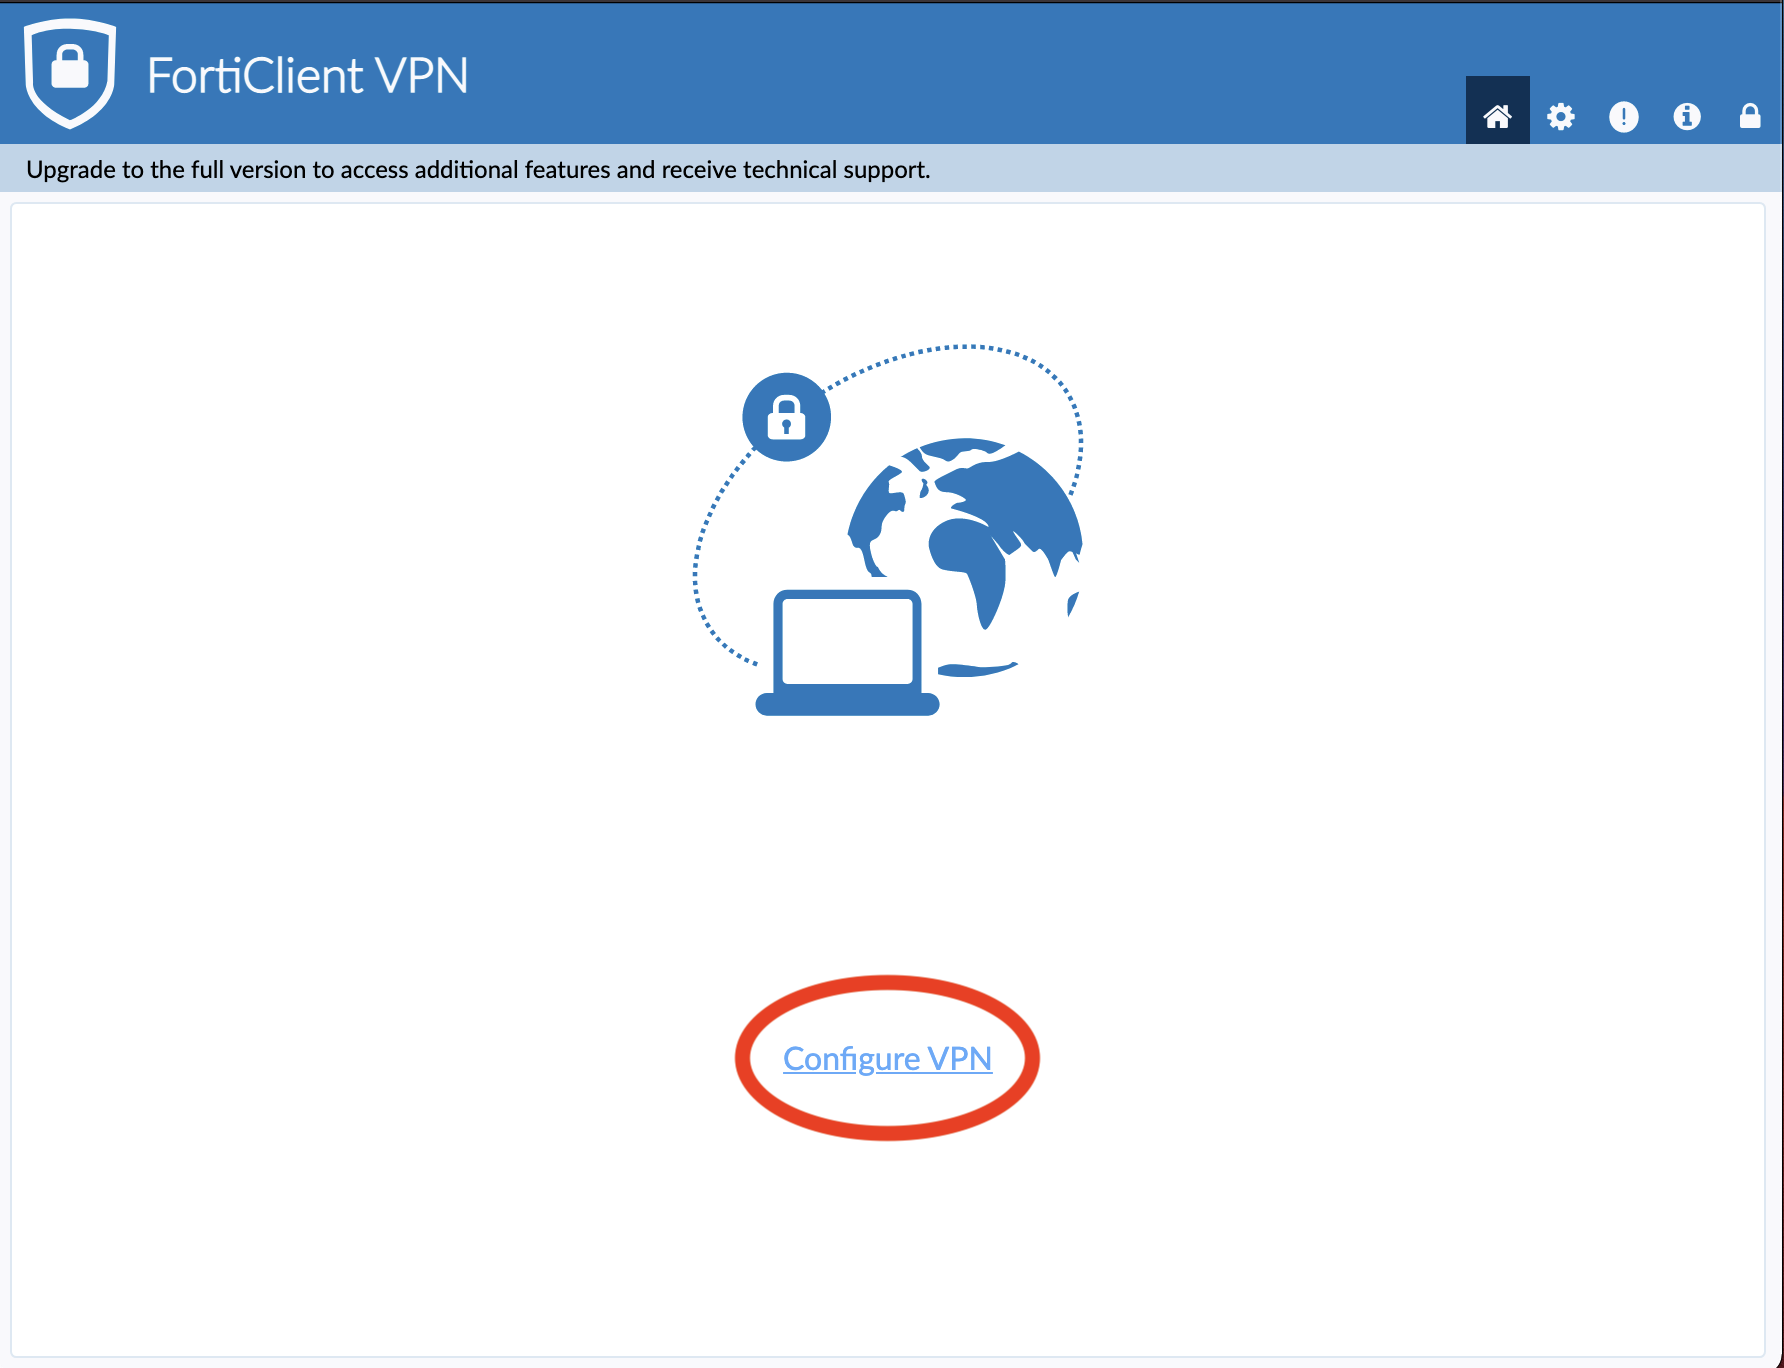
- Start the FortiClient software on your computer.
- In the fortiClient VPN window, click the "Configure VPN" link:
- On the "New VPN Connection Screen"
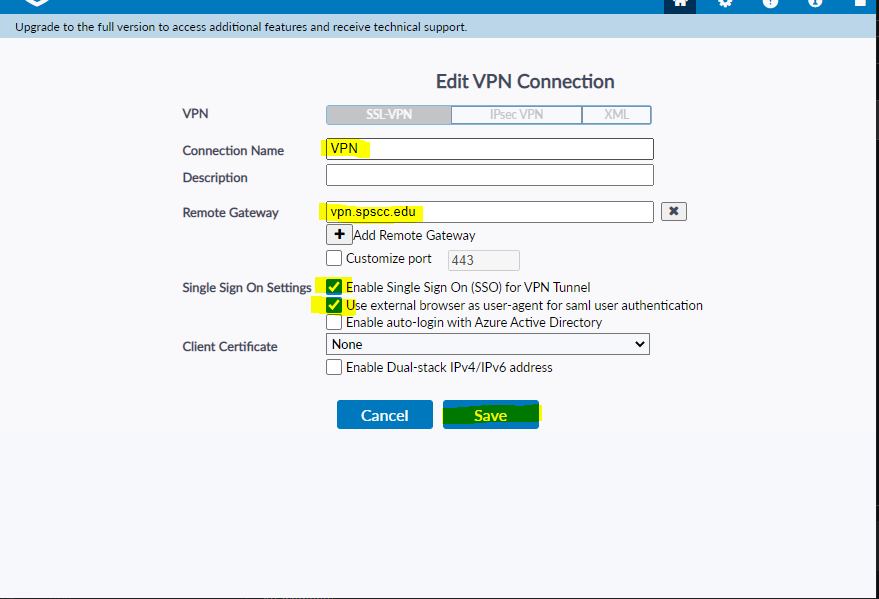
- Ensure the SSL-VPN tab is selected (this is the default)
- Put "SPSCC" in the Connection Name
- Put in "vpn.spscc.edu" into the Remote Gateway
- Ensure that the "Enable Single Sign On (SSO) for VPN Tunnel" and "User external browser as user-agent" checkboxes are checked. (NOTE: If your version of Forticlient does not have this checkbox, disregard.)
- Click "Save"
- All set! now on to...
Starting the VPN
- After having saved your VPN settings and any time you start the FortiClient software after that, you will get a screen like this:
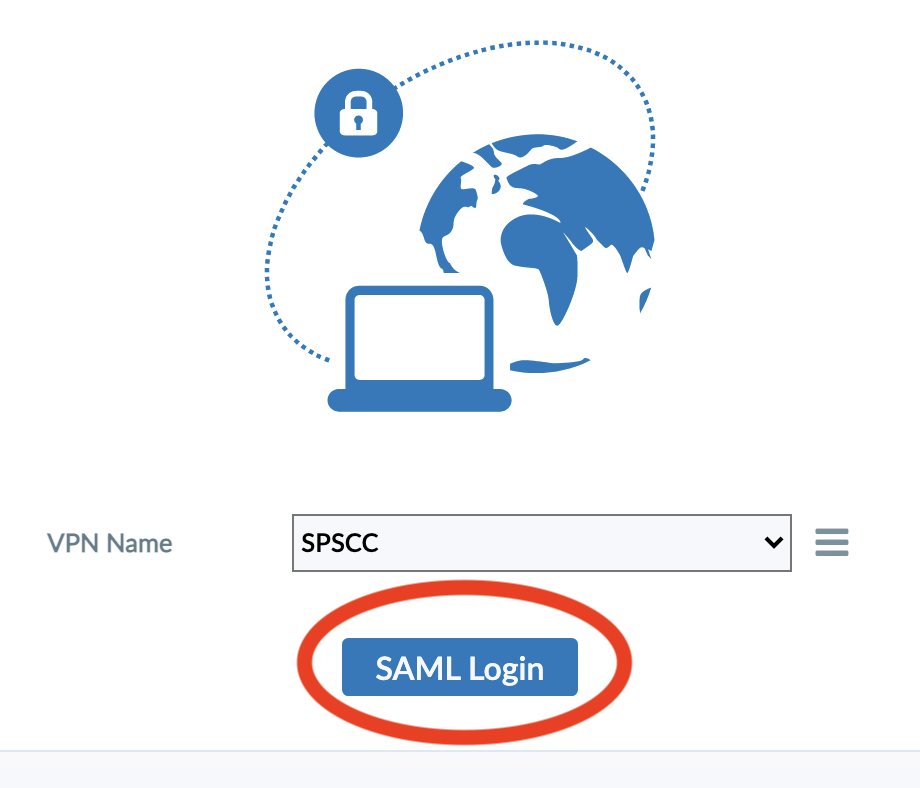
- As indicated, click the "SAML Login" button and authenticate with your ClipperID to start the VPN tunnel.
- A new browser window will open up, and indicate that the connection was successful.
- When in the tunnel, the Forticlient window will look something like this:
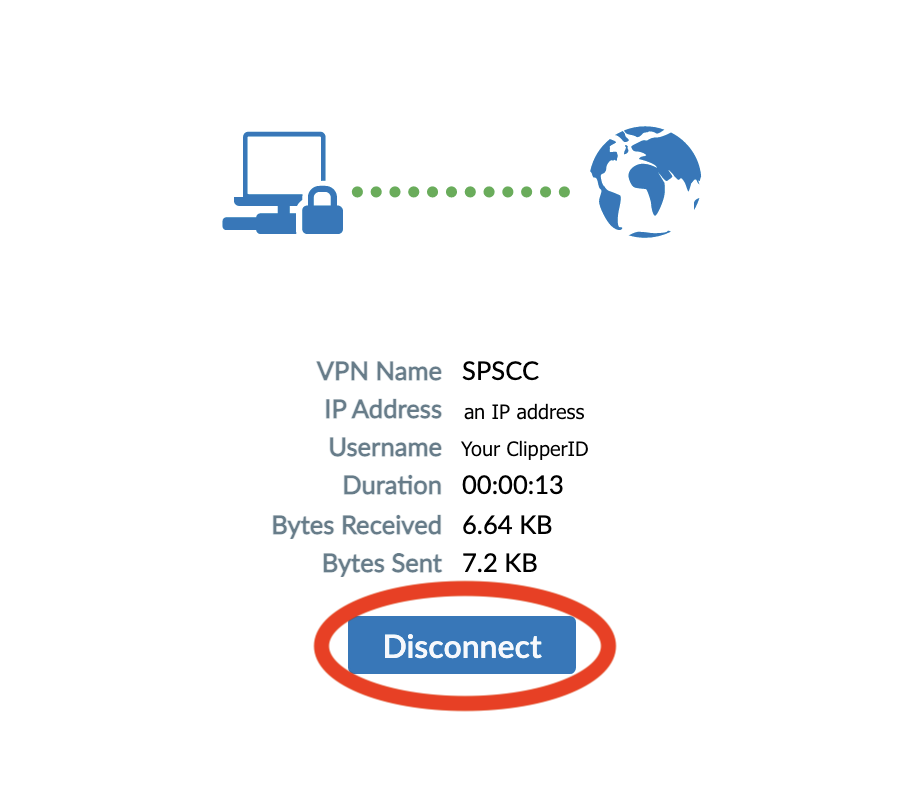
- When you're done with the VPN click the "Disconnect" button to shut down the tunnel.
Categories
Audience
Need More Help? Contact:
IT Services Help Desk
if you run into any issues following this guide, please contact the IT Services Help Desk to resolve them.
We're open from 8:00am to 5:00pm M-Th, 10:00am to 5:00pm F
- at 360-596-5544
- or helpdesk@spscc.edu
- or even visit us in person on the first floor of Building 22