-
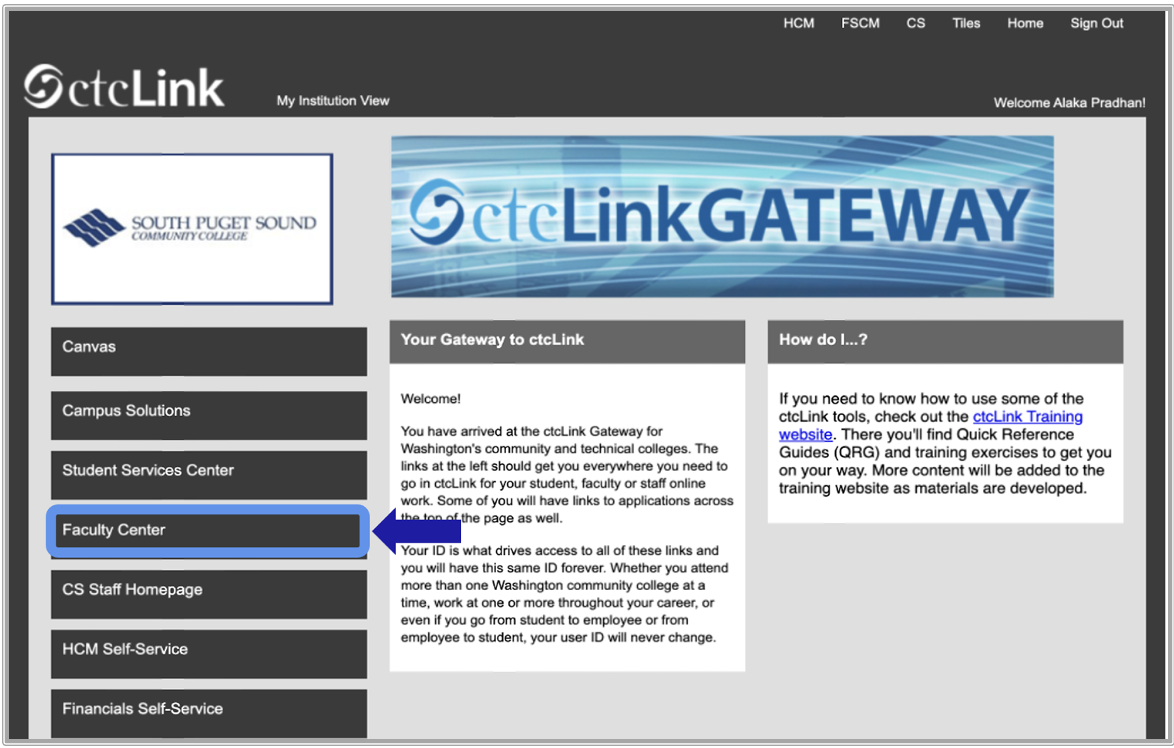
Navigation: Gateway > Faculty Center.
-
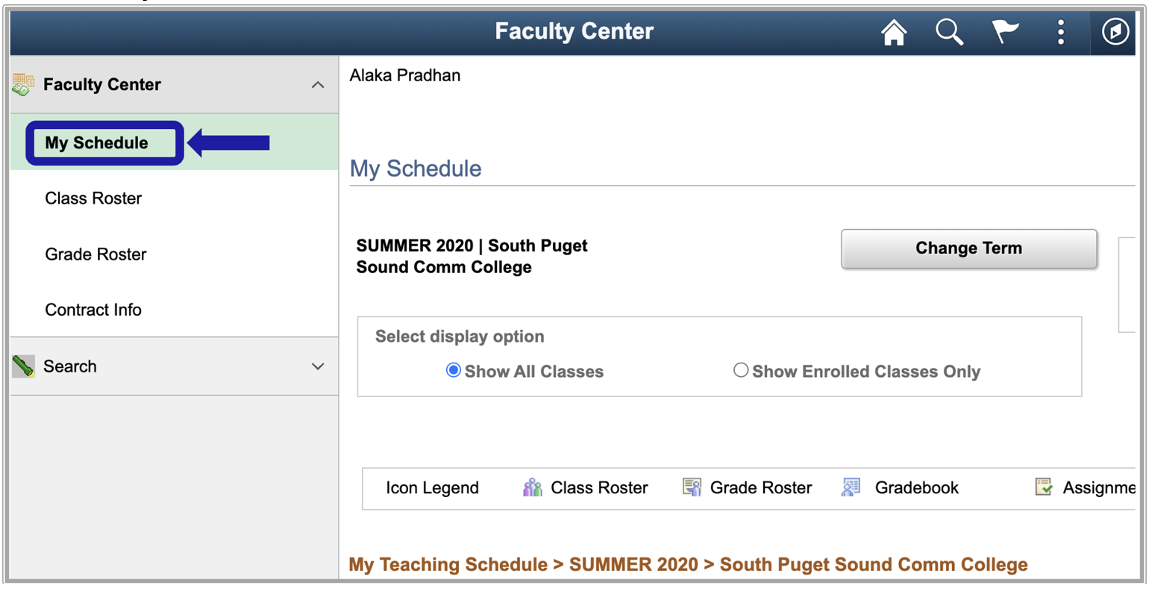
Select My Schedule.
-
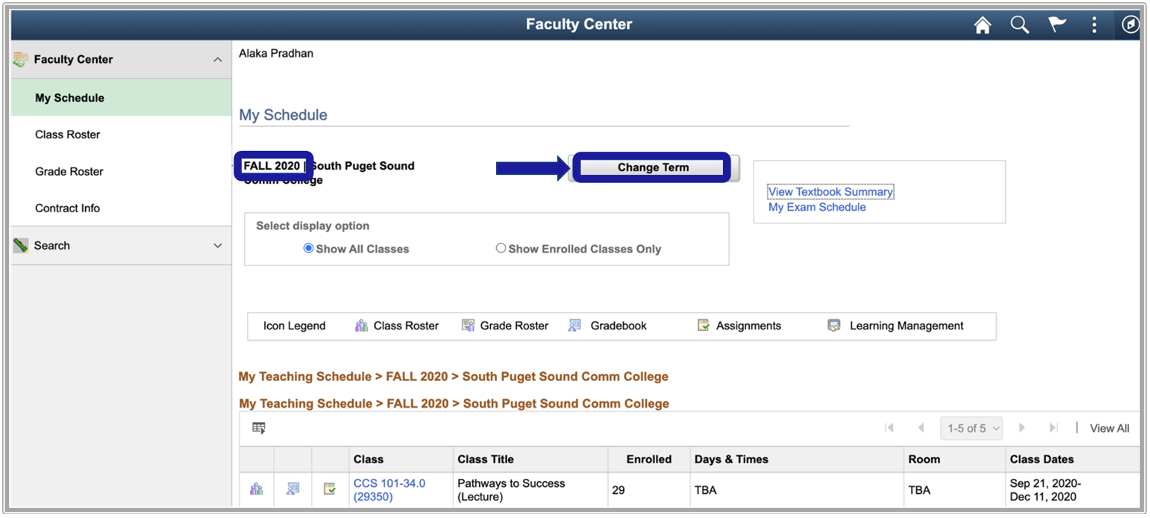
Verify you are viewing the correct term. If necessary, select Change Term to change between terms.
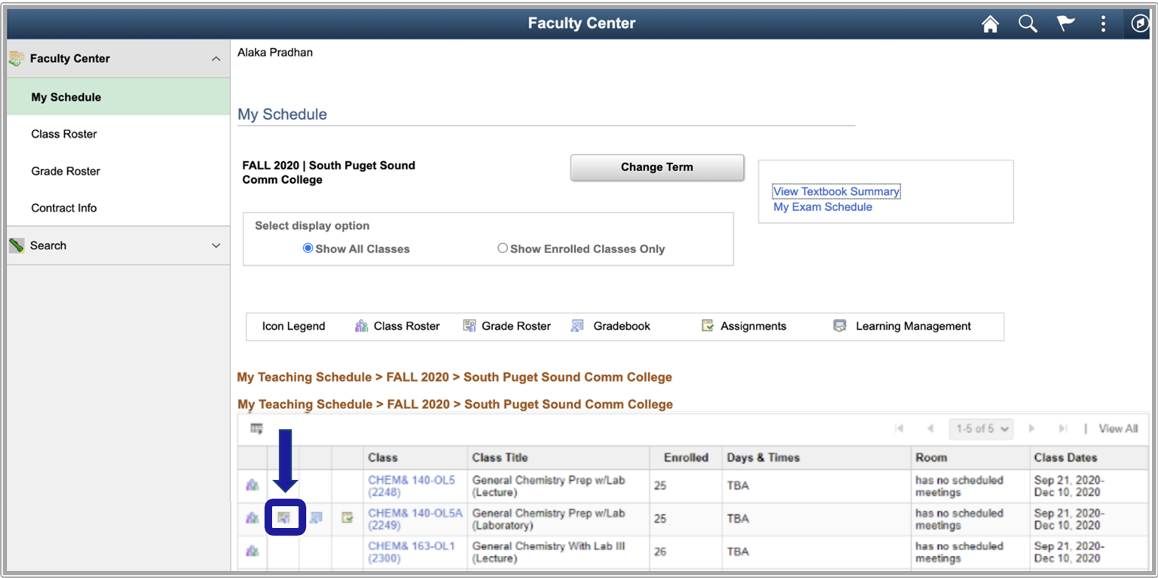
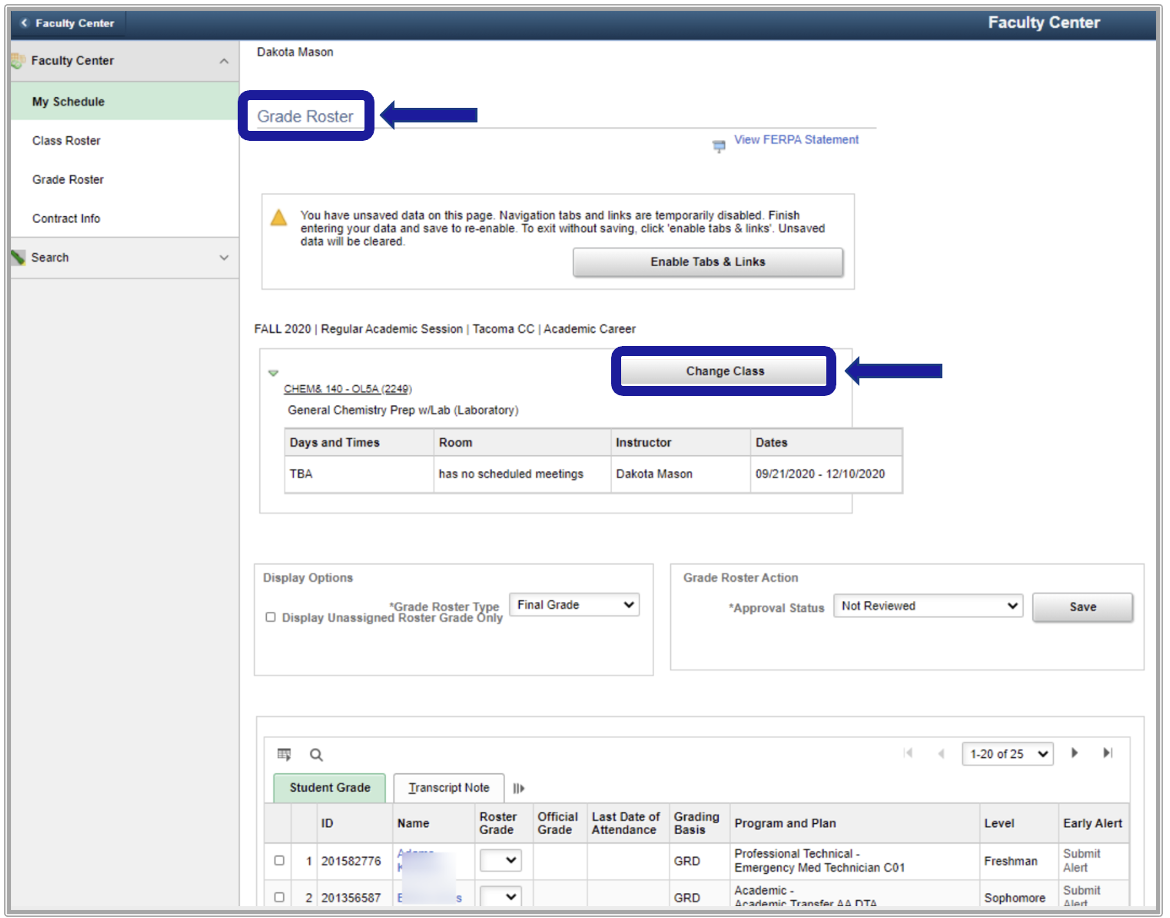
- To view the Grade Roster for an individual class, select the Grade Roster icon next to the appropriate class.
- The Grade Roster page displays with the selected class.
- Change between classes by selecting Change Class.
- The My Schedule page will update to allow a different class to be selected.
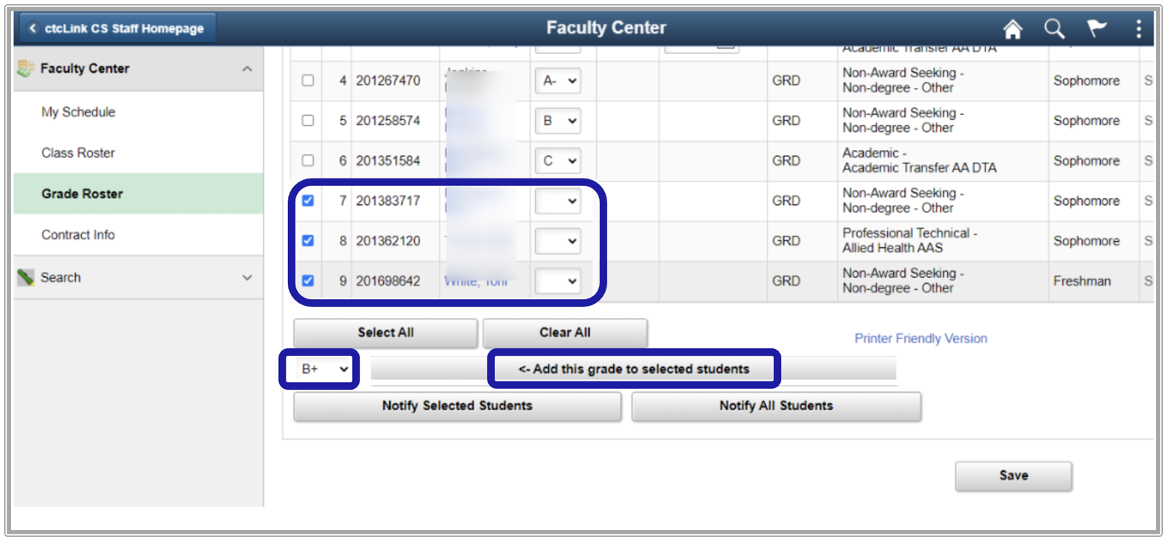
- To enter grades for individual students, select the appropriate grade from the drop-down box.
- If you assign certain non-passing grades to students, a Last Date of Attendance becomes required. If applicable, enter the student's Last Date of Attendance.

- To add the same grade to multiple students at a time,
- Select the appropriate students.
- Activate the drop-down list and choose the appropriate grade.
- Select the <-Add this grade to selected students button.
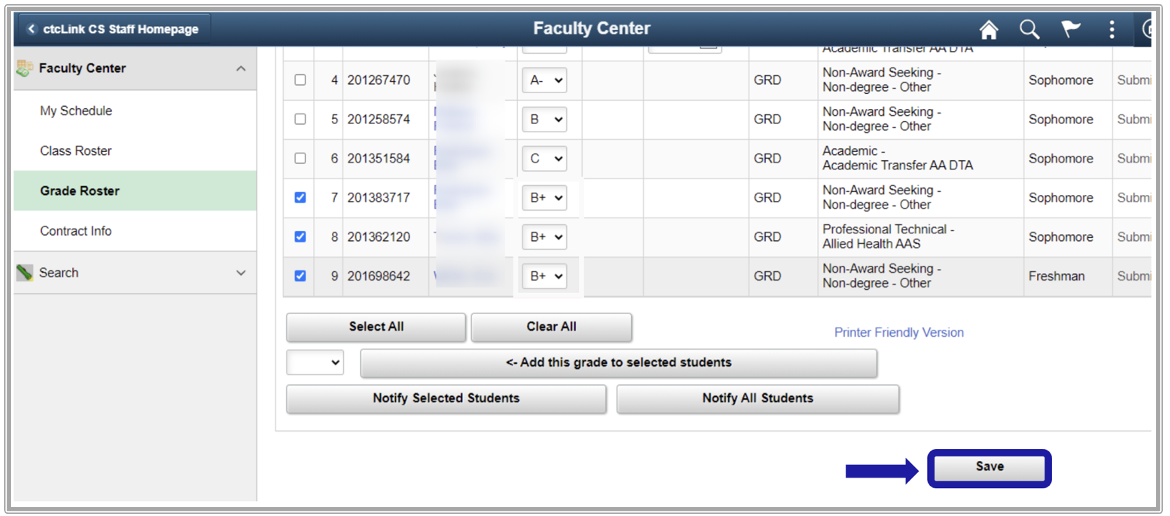
- After entering all student grades, select Save.
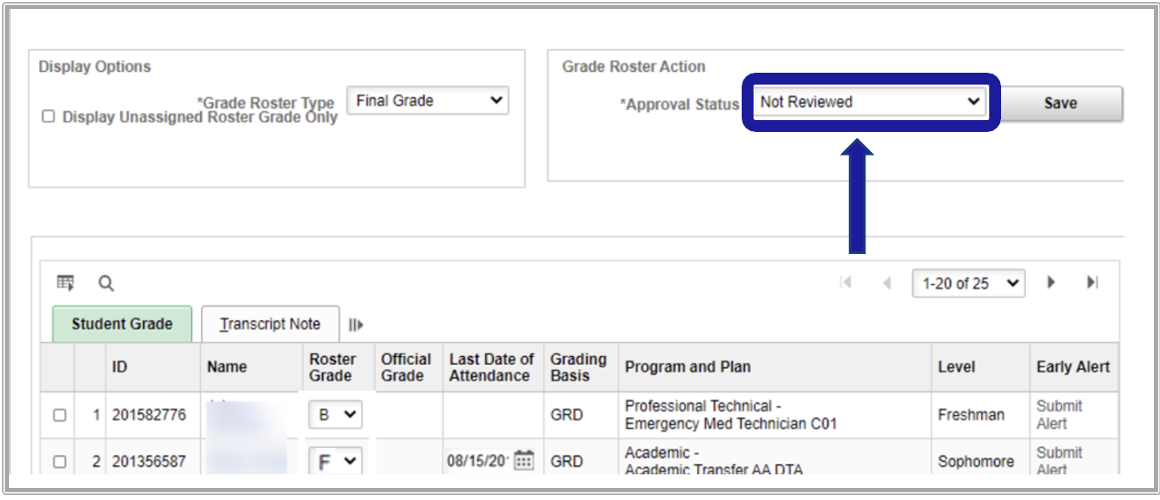
- After all grades are entered and saved, review them for accuracy.
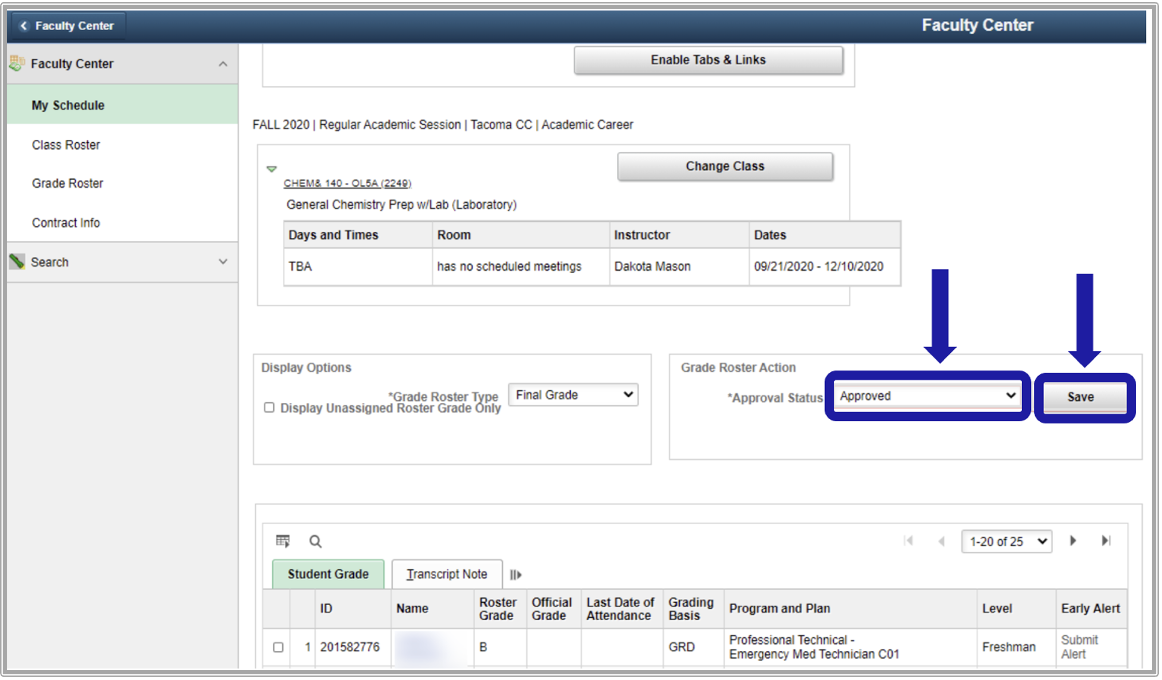
- In the Grade Roster Action section, choose the appropriate Approval Status from the drop-down menu.
- Select the the Save button.
Note: Changing Approval Status before grades are saved will cause all grades to be lost. You must save grades before approving them.

-
If grade changes need to be made after saving an Approved roster, change the status back to Not Reviewed. This will allow you to make the necessary grade changes.
- Once the grade changes are complete, change the Approval Status back to Approved before saving.
- Select the Save button.
Note: To change grades that have already been approved and posted contact the Records and Enrollment office to make the necessary changes.
IT Services Help Desk
if you run into any issues following this guide, please contact the IT Services Help Desk to resolve them.
We're open from 8:00am to 5:00pm M-Th, 10:00am to 5:00pm F
- at 360-596-5544
- or helpdesk@spscc.edu
- or even visit us in person on the first floor of Building 22